使用 MinIO 与 PicList 自建对象存储与图床
前言
MinIO 是一个对象存储系统,它将数据以对象的形式进行存储。这些对象可以是各种类型的数据,例如文件、图片、视频等。我们可以在 VPS 服务器或者自己的 Nas 上进行部署,本文主要用它来存储图片作为图床来使用,我们可以直接在 MinIO 后台管理界面直接上传图片,通过 https://domain.com/bucket/image.png 这种形式访问图片。
PicList 是一款高效的云存储和图床平台管理工具,通过 PicList 上传图片时,可以自动对图片进行预处理,例如压缩图片、格式转换、添加水印等,同时在上传成功后,还会自动拼接 URL 地址。
Typora 是一款 Markdown 编辑器和阅读器,通过图像设置将上传服务选择为 PicList,即可实现图片拖入 Typora 后,自动调用 PicList 进行图片的预处理,然后将其上传至 MinIO 中,实现图片的无感上传。
MinIO 服务端
安装 MinIO
MinIO 的安装十分简单,只需要使用官方一键脚本即可安装
警告
MinIO 社区版 2025 年 5 月及以后的版本,大砍 Web UI 功能,并且 10 月起社区版不再提供构建后的二进制文件以及 Docker 镜像,目前建议使用 minio_20250422221226.0.0_amd64.deb 这个版本。
wget -O minio.deb https://dl.min.io/server/minio/release/linux-amd64/archive/minio_20250422221226.0.0_amd64.deb

dpkg -i minio.deb卸载可以使用
apt remove --purge minio
通过一键脚本安装后,会自动创建 systemd 文件 /usr/lib/systemd/system/minio.service ,可以按照自己的需求编辑
[Unit]
Description=MinIO
Documentation=https://min.io/docs/minio/linux/index.html
Wants=network-online.target
After=network-online.target
AssertFileIsExecutable=/usr/local/bin/minio

[Service]
WorkingDirectory=/usr/local

User=root
Group=root
ProtectProc=invisible

EnvironmentFile=-/etc/default/minio
ExecStartPre=/bin/bash -c "if [ -z \"${MINIO_VOLUMES}\" ]; then echo \"Variable MINIO_VOLUMES not set in /etc/default/minio\"; exit 1; fi"
ExecStart=/usr/local/bin/minio server $MINIO_OPTS $MINIO_VOLUMES

# MinIO RELEASE.2023-05-04T21-44-30Z adds support for Type=notify (https://www.freedesktop.org/software/systemd/man/systemd.service.html#Type=)
# This may improve systemctl setups where other services use `After=minio.server`
# Uncomment the line to enable the functionality
# Type=notify

# Let systemd restart this service always
Restart=always

# Specifies the maximum file descriptor number that can be opened by this process
LimitNOFILE=65536

# Specifies the maximum number of threads this process can create
TasksMax=infinity

# Disable timeout logic and wait until process is stopped
TimeoutStopSec=infinity
SendSIGKILL=no

[Install]
WantedBy=multi-user.target

# Built for ${project.name}-${project.version} (${project.name})创建环境变量文件 vim /etc/default/minio,其中主要配置 MinIO 的用户名、密码、存储卷、控制面板端口等
# MINIO_ROOT_USER and MINIO_ROOT_PASSWORD sets the root account for the MinIO server.
# This user has unrestricted permissions to perform S3 and administrative API operations on any resource in the deployment.
# Omit to use the default values 'minioadmin:minioadmin'.
# MinIO recommends setting non-default values as a best practice, regardless of environment

MINIO_ROOT_USER=myminioadmin
MINIO_ROOT_PASSWORD=minio-secret-key-change-me

# MINIO_VOLUMES sets the storage volume or path to use for the MinIO server.
MINIO_VOLUMES="/opt/minio"

# MINIO_OPTS sets any additional commandline options to pass to the MinIO server.
# For example, `--console-address :9001` sets the MinIO Console listen port
MINIO_OPTS="--address :9000 --console-address :9001"

# MINIO_SERVER_URL sets the hostname of the local machine for use with the MinIO Server
# MinIO assumes your network control plane can correctly resolve this hostname to the local machine

# Uncomment the following line and replace the value with the correct hostname for the local machine and port for the MinIO server (9000 by default).

# 一般情况下无需填写 MINIO_SERVER_URL
# MINIO_SERVER_URL="https://minio.example.net"

# 通过 Nginx 反向代理时建议设置
# MINIO_BROWSER_REDIRECT=false
# MINIO_BROWSER_REDIRECT_URL="https://minio.example.net/ui"启动 MinIO
systemctl start minio.service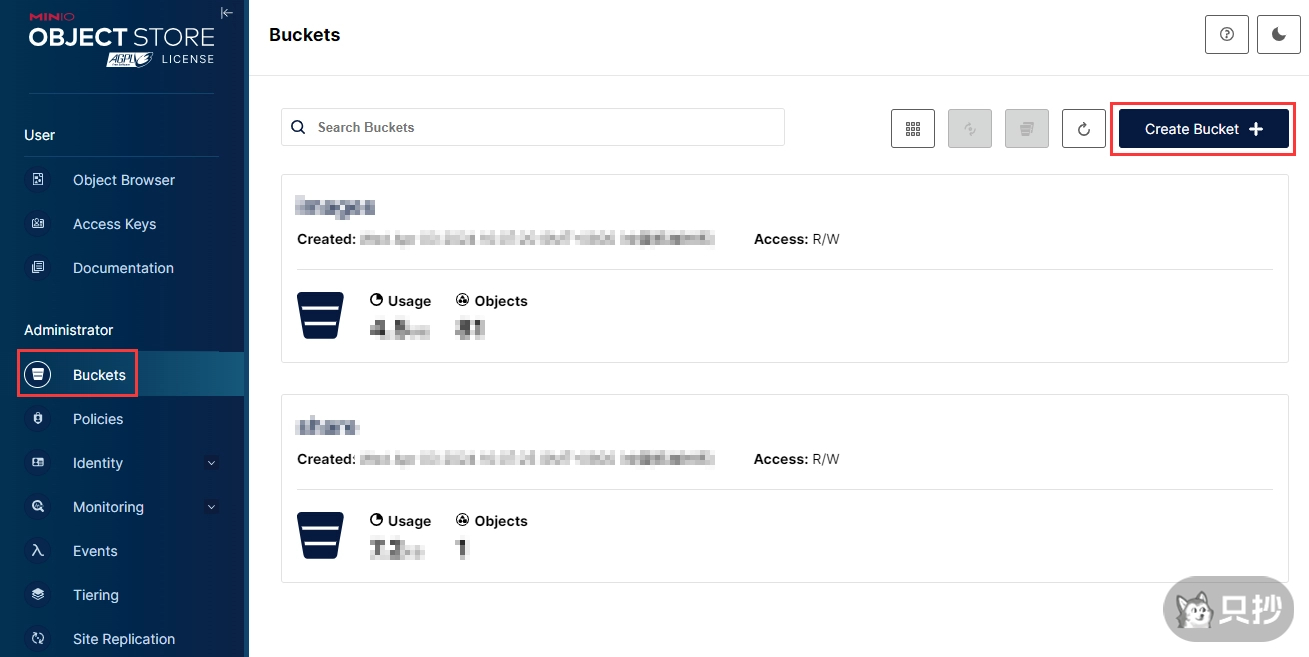
systemctl enable minio.service创建 Bucket
- 通过
http://ip:9001访问 MinIO 的控制面板,使用环境变量中设置的用户名与密码进行登录 - 点击左侧的 Buckets,再点击右上角的 Create Bucket 创建一个存储桶,用于存储上传的图片
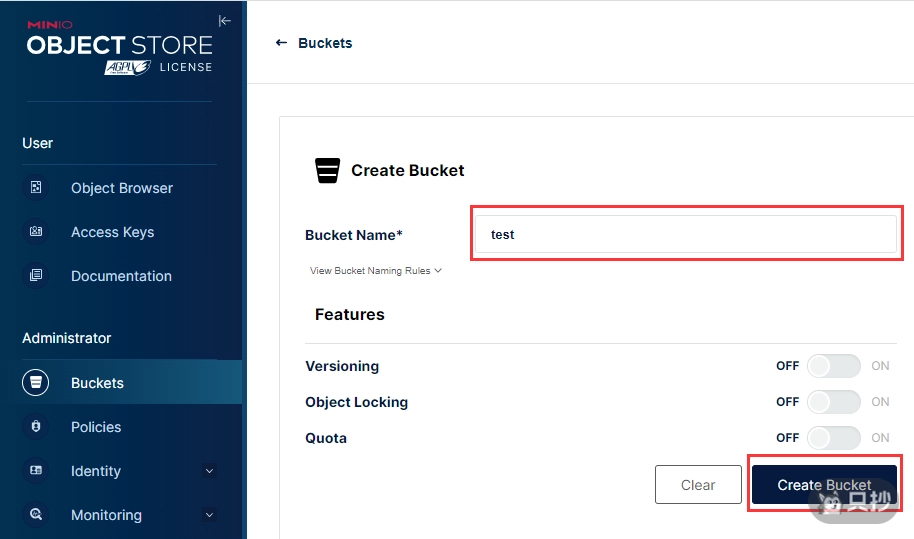
- 给存储桶进行命名,桶名会在访问时,拼接在 URL 中
权限设置
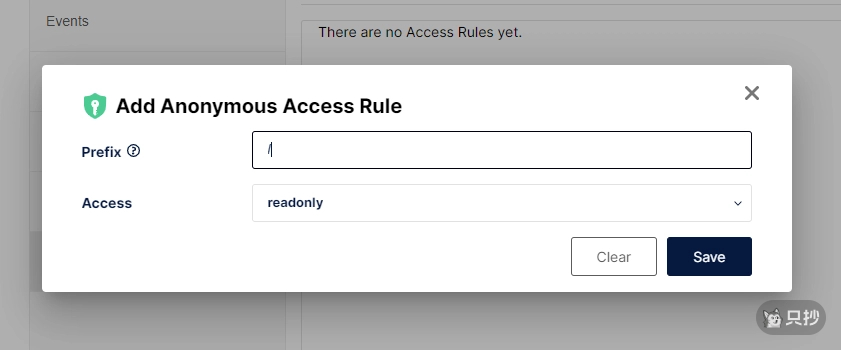
- 创建完成后,桶中的文件还无法进行访问,需要对其设置访问权限,进入桶的设置后,依次点击 Anonymous -> Add Access Rule 添加访问规则
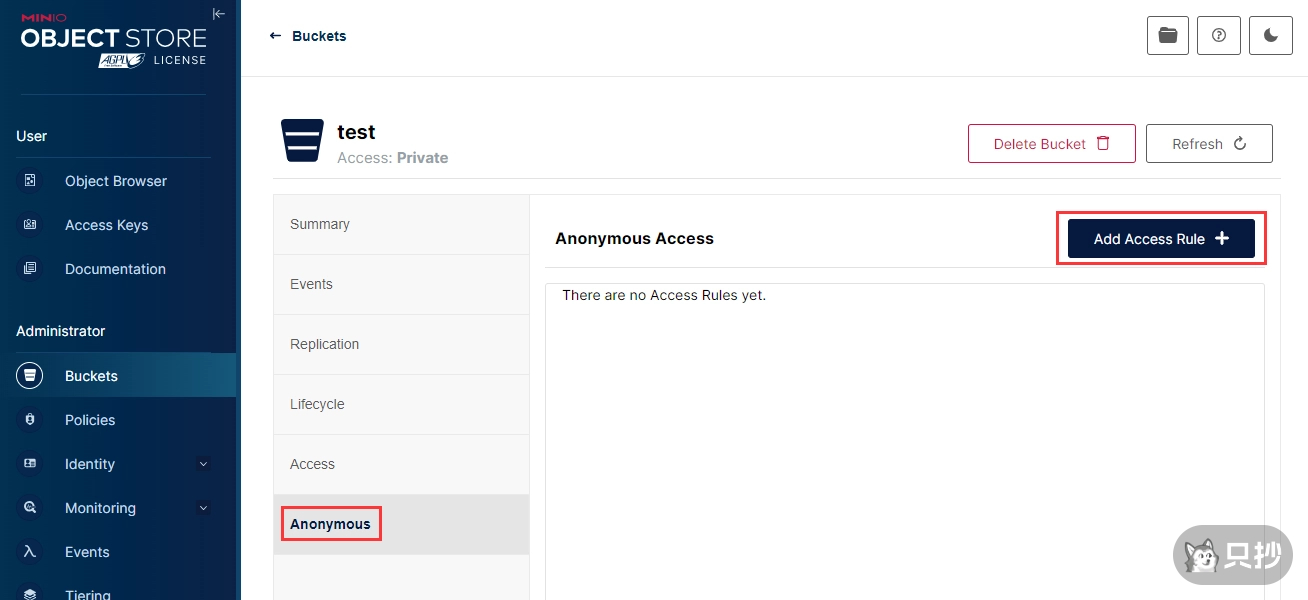
- 对于公开访问的图床,我们可以将访问权限设置为 readonly
- 返回桶设置的首页,发现 Access Policy 处变为 custom,说明设置成功了
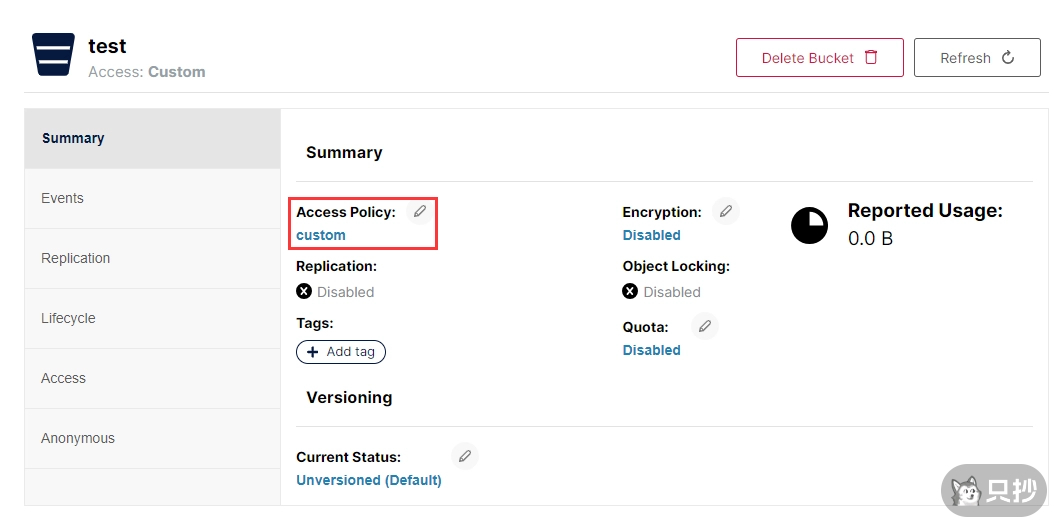
- 对于非公开访问的图片,例如仅限自己的网站访问,则可以点击 custom,直接编辑访问规则,填入以下规则,并将 Resource 与 aws:Referer 修改为自己的桶名与网站域名
{
  "Version": "2012-10-17",
  "Statement": [
    {
      "Effect": "Allow",
      "Principal": {
        "AWS": ["*"]
      },
      "Action": "s3:GetObject",
      "Resource": ["arn:aws:s3:::test/*"],
      "Condition": {
        "StringLike": {
          "aws:Referer": ["https://zhichao.org/*"]
        }
      }
    }
  ]
}Nginx 反向代理
# Allow special characters in headers
ignore_invalid_headers off;
# Allow any size file to be uploaded.
# Set to a value such as 1000m; to restrict file size to a specific value
client_max_body_size 0;
# Disable buffering
proxy_buffering off;
proxy_request_buffering off;

location / {
  proxy_set_header Host $http_host;
  proxy_set_header Accept-Encoding "identity"; # 开启 Cloudflare CDN 时需要添加
  proxy_set_header X-Real-IP $remote_addr;
  proxy_set_header X-Forwarded-For $proxy_add_x_forwarded_for;
  proxy_set_header X-Forwarded-Proto $scheme;
  proxy_connect_timeout 300;
  # Default is HTTP/1, keepalive is only enabled in HTTP/1.1
  proxy_http_version 1.1;
  proxy_set_header Connection "";
  chunked_transfer_encoding off;
  proxy_pass http://localhost:9000;
}

location /minio/ui/ {
  rewrite ^/minio/ui/(.*) /$1 break;
  proxy_set_header Host $http_host;
  proxy_set_header X-Real-IP $remote_addr;
  proxy_set_header X-Forwarded-For $proxy_add_x_forwarded_for;
  proxy_set_header X-Forwarded-Proto $scheme;
  proxy_set_header X-NginX-Proxy true;
  # This is necessary to pass the correct IP to be hashed
  real_ip_header X-Real-IP;
  proxy_connect_timeout 300;
  # To support websockets in MinIO versions released after January 2023
  proxy_http_version 1.1;
  proxy_set_header Upgrade $http_upgrade;
  proxy_set_header Connection "upgrade";
  # Some environments may encounter CORS errors (Kubernetes + Nginx Ingress)
  # Uncomment the following line to set the Origin request to an empty string
  # proxy_set_header Origin '';
  chunked_transfer_encoding off;
  proxy_pass http://localhost:9001; # This uses the upstream directive definition to load balance
}MinIO 客户端
安装
curl -LO https://dl.min.io/client/mc/release/linux-amd64/mc
chmod +x mc
mv mc /usr/bin/配置
设置别名后,使用时直接使用别名操作即可,无需输入 URL 和 KEY,配置保存在 /root/.mc/config.json 中
mc alias set <ALIAS> <URL> <ACCESS_KEY> <SECRET_KEY>

mc alias set local http://127.0.0.1:9000 <ACCESS_KEY> <SECRET_KEY>常见用法
备份 MinIO 中的文件
mc cp --recursive local ~/minio-origin单向同步两个 MinIO 的文件
mc mirror --overwrite --remove local/bucket-A remote/bucket-A自动同步
使用 --watch 还可以实现自动同步,但直接运行这行命令需要一直开着 SSH
mc mirror --overwrite --remove --watch local/bucket-A remote/bucket-A要想让它能够顺利在后台运行,我们需要通过 systemd 来创建一个服务
vim /etc/systemd/system/mc-mirror.service内容如下:
[Unit]
Description=MC Mirror Watch Service
After=network.target

[Service]
Type=simple
User=root
ExecStart=mc mirror --overwrite --remove --watch local/bucket-A remote/bucket-A
Restart=always
RestartSec=5
StandardOutput=journal
StandardError=journal

[Install]
WantedBy=multi-user.target保存后重新加载 systemd 并启动服务
systemctl daemon-reload
systemctl enable mc-mirror.service
systemctl start mc-mirror.servicePicList
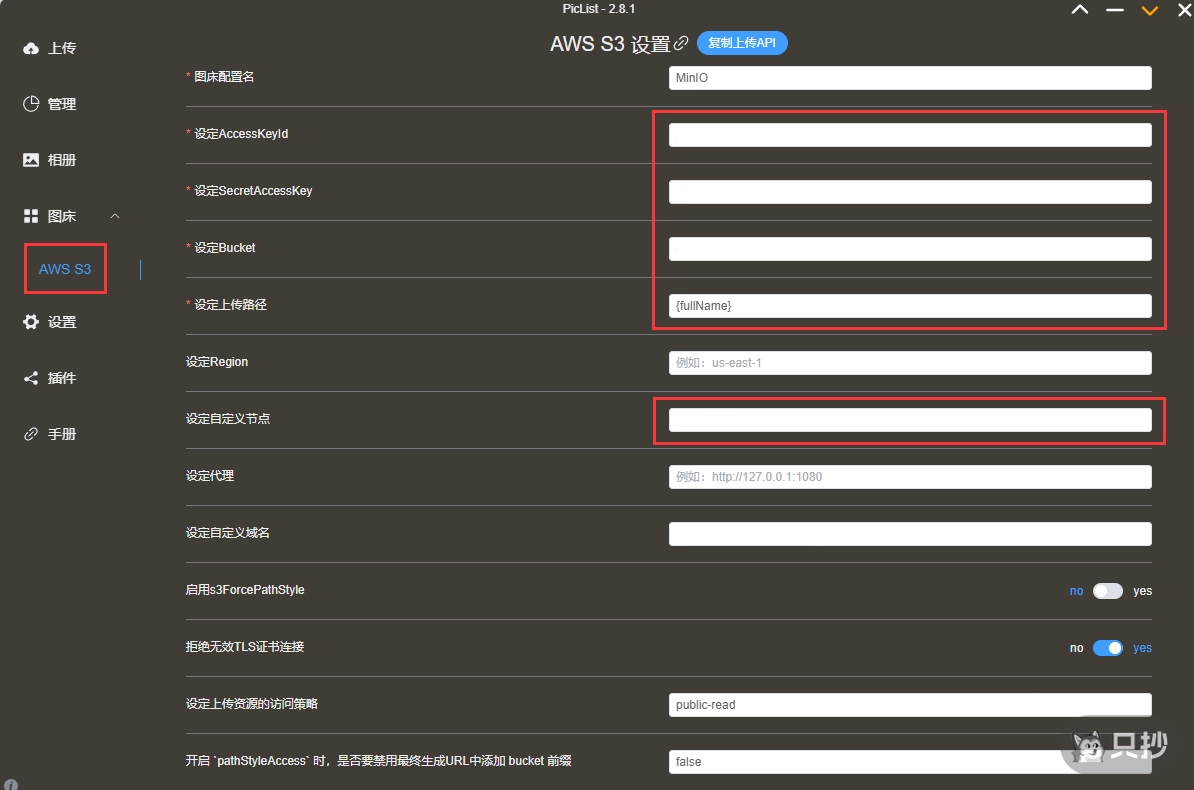
PicList 可以直接在官方文档进行下载,打开 PicList 后,在左边图床中选择 AWS S3 进行编辑,完成以下设置后,点击保存即可
- AccessKeyId - MinIO 用户名 或 Access Key (推荐)
- SecretAccessKey - MinIO 密码 或 Secret Key (推荐)
- Bucket - 桶名
- 设定自定义节点 - API 地址 (例如 http://ip:9000)
- 启用 s3ForcePathStyle - 如果 API 地址使用的是域名,则需要勾选
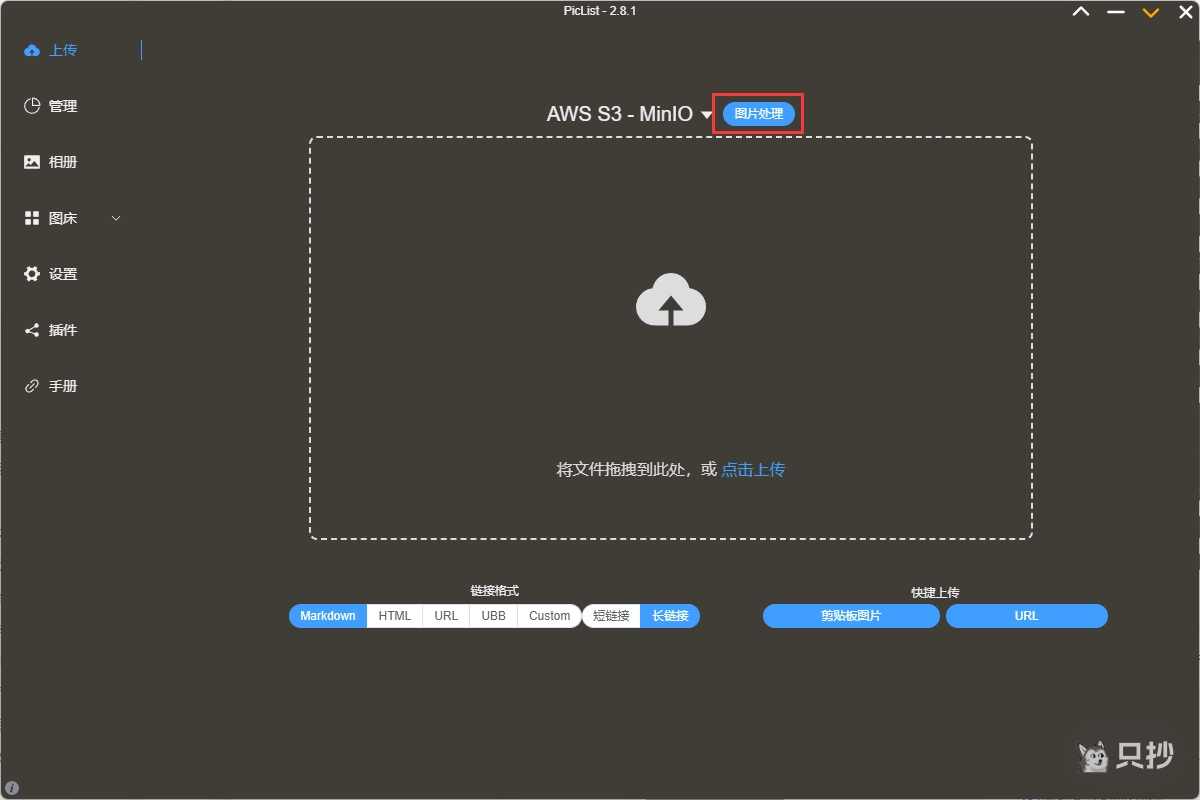
除此之外,来到上传页面,点击上方的图片处理,可以对上传的图片进行压缩、格式转换等操作
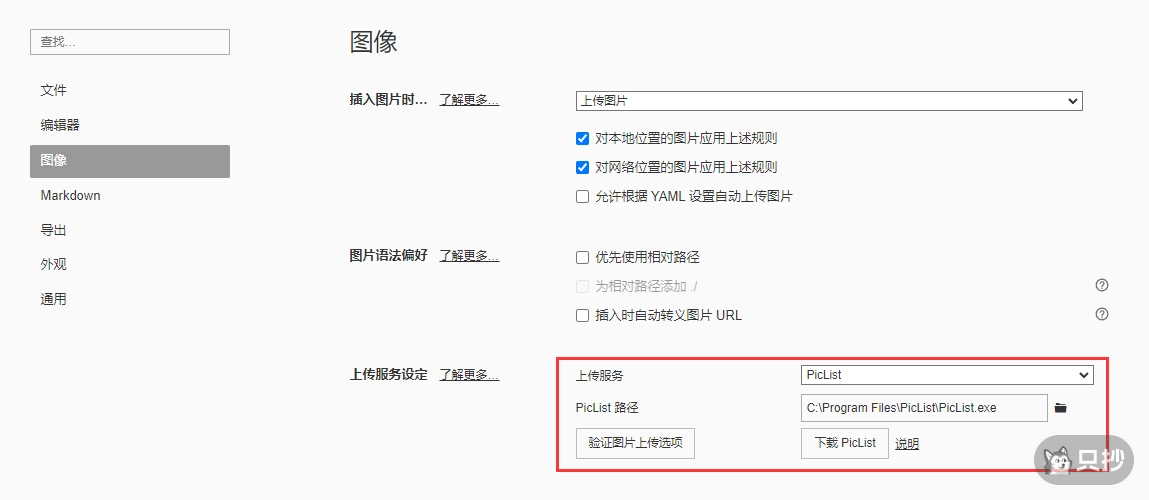
Typora
Typora 1.6.0 以上版本直接参照下图,选择 PicList 路径即可,1.6.0 以下版本则需参照 PicList 文档进行设置
完成以上步骤后,在 Typora 中写作时,上传图片只需要将图片拖入对应位置,即可自动完成图片的处理、上传。